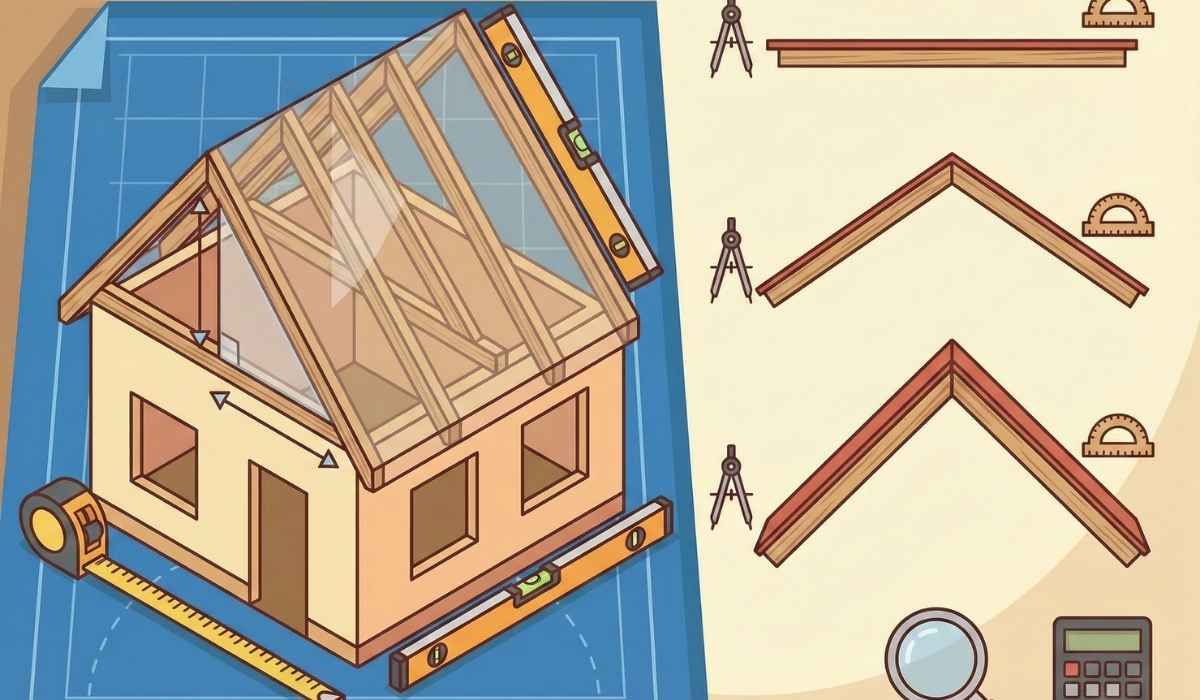
How to Find the Pitch on a Roof?
| Pitch (x:12) | Degrees | Roofing Types | Typical Use |
|---|---|---|---|
| 1:12 | 4.8° | Metal sheeting (concealed fix) | Patios, carports |
| 2:12 | 9.5° | Metal with overlap | Low-slope residential |
| 4:12 | 18.4° | Metal, some tiles with sarking | Standard Aussie homes |
| 6:12 | 26.6° | All tiles, metal | Traditional suburban |
| 8:12 | 33.7° | Any material | Queenslander-style, heritage |
| 12:12 | 45° | Premium tiles, slate | Steep European-style |
Right, let's crack into it properly.
Why Roof Pitch Matters in Australia
Mate, roof pitch isn't just some technical detail for engineers to worry about—it has genuine, practical impacts on your home's performance and your hip pocket.
First up, there's compliance. The National Construction Code and Australian Standard AS 2050 set minimum pitch requirements that aren't suggestions—they're law. For metal roofing, you're looking at a bare minimum of 5 degrees (roughly 1:12) for most applications, though many manufacturers recommend steeper to be safe. Tiles need at least 15 degrees to prevent water backing up under the overlaps. Go below these minimums and you're risking water ponding, which leads to rust, leaks, and eventually major structural repairs that'll cost you thousands.
Then there's the bushfire angle, which is bloody important across most of Australia. In Bushfire Attack Level (BAL) zones, steeper roofs actually perform better because they shed embers more effectively. A 22-degree pitch or steeper means burning debris slides off rather than accumulating in valleys or flat sections where it can ignite your roof.
But pitch also affects practical stuff you deal with daily. Planning a solar installation? Panels work most efficiently on roofs between 5:12 and 4:12 in most Aussie locations. Need to estimate materials for a roof replacement in melbourne or in pakenham? The pitch determines your multiplier—a 6:12 pitch means you'll need 11.8% more material than the flat horizontal measurement (that's a multiplier of 1.118). Insurance claims after a storm?
Assessors will check your pitch to determine appropriate materials and whether water damage was preventable.
Material Length Multipliers by Pitch
- 2:12 pitch = 1.014 multiplier
- 4:12 pitch = 1.054 multiplier
- 6:12 pitch = 1.118 multiplier
- 8:12 pitch = 1.202 multiplier
- 10:12 pitch = 1.302 multiplier
- 12:12 pitch = 1.414 multiplier
Essential Tools and Safety Gear
Before you even think about climbing up there, let's talk tools and safety—because a trip to Bunnings beats a trip to the hospital any day of the week.
Tools List
For basic pitch measurement, you don't need to break the bank. A decent 5-metre tape measure is essential—get one with a good clip and lock mechanism. You'll want a spirit level at least a metre long (600mm will do in a pinch, but longer is more accurate). A speed square is brilliant for quick angle checks and only costs about fifteen bucks. And obviously, a calculator, though your phone does the job these days.
If you want to get a bit fancier, a laser level takes the guesswork out completely and pays for itself if you're doing multiple measurements. For the tech-savvy, smartphone apps like Roof Pitch Angle or Pitch Gauge use your phone's accelerometer to measure angles directly—just hold it against a rafter or the roof surface. Some are surprisingly accurate, within half a degree if you've calibrated properly.
For roofs you can't safely access, consider a drone with a camera or even good old Google Earth for approximate measurements using shadows and geometry.
Safety Protocols (WorkSafe NSW/VIC)
Right, this is where I get serious for a minute. WorkSafe regulations across all Australian states are pretty bloody clear: any roof steeper than 2:12 (about 9.5 degrees) requires proper fall protection. That means harnesses, anchor points, and ideally, a spotter on the ground.
Minimum requirements include non-slip footwear (those old thongs aren't gonna cut it), securing your ladder according to AS/NZS 1892, and checking weather conditions—wet roofs are slippery as hell, and nobody works in high winds.
For heritage roofs, old tiles, or anything that looks dodgy, measure from the ground using the methods we'll cover later. No measurement is worth a broken leg or worse.
Tool Accuracy Comparison
| Method | Accuracy | Cost | Conditions Needed |
|---|---|---|---|
| Manual tape/level | ±0.5° | $30-50 | Roof access, calm day |
| Speed square | ±1° | $15-25 | Direct rafter access |
| Smartphone app | ±0.5-1° | Free-$10 | Calibrated device |
| Laser level | ±0.2° | $100-300 | Line of sight |
| Drone photography | ±2° | $50+ (service) | Clear conditions |
Step-by-Step On-Site Measurement
Alright, let's get into the nitty-gritty of actually measuring your roof pitch. I'll give you two main methods that work in Australian conditions.
Step 1: Ladder Setup and Access
First things first—set up your ladder properly. It should extend at least a metre above the gutter line, be on firm, level ground, and positioned at about a 75-degree angle (one unit out for every four units up). Give it a good shake before trusting it with your weight. Walk around the roof edge first, checking for loose tiles, rusted metal, or soft spots that could give way.
Step 2: The 12-Inch Run Method (or 305mm for Us)
This is the classic tradie method and it's dead accurate if you do it right. You'll need your tape measure and spirit level.
Locate a rafter in your roof space if you can access it through a manhole. If not, you'll need to work on the actual roof surface, but be extra careful about disturbing tiles or sheeting.
Place your spirit level horizontally along the rafter (or roof surface), making sure the bubble's bang-on centre. From the starting point, measure exactly 305mm (12 inches) along the level—this is your "run." Now, from that 305mm mark, measure straight down (perpendicular) to the rafter or roof surface. This vertical measurement is your "rise."
Let's say you measured 155mm of rise over your 305mm run. To express this as an x:12 pitch, you'd calculate: (155mm ÷ 305mm) × 12 = 6.1:12 pitch. Near enough to 6:12 for practical purposes.
Pro tip: Take measurements at three different spots across your roof and average them. Settling and age can create variations, and you want the most accurate picture possible.
Step 3: Full Roof Rise and Run Method
For a more comprehensive measurement, especially on larger roofs, measure the total rise and run. From the very edge of your eaves, measure the horizontal distance to directly below the ridge—that's your total run. Then measure the vertical distance from eaves level up to the ridge—that's your total rise.
To convert this to pitch, divide rise by run, then take the arctangent (inverse tangent or tan⁻¹ on your calculator) to get degrees. For example, if you've got 2.5 metres of rise over 5 metres of run: arctan(2.5 ÷ 5) = arctan(0.5) = 26.6 degrees, which is your 6:12 pitch again.
Key Measurements Explained:
- Always measure horizontally when checking run—not along the roof slope
- Rise must be perfectly vertical—a plumb bob helps here
- Check multiple rafters as they can vary by 5-10mm
- Write everything down immediately—you'll forget faster than you think
- Take photos of your measurements for reference later
If you're looking at birdsmouth cuts for new rafter work or trying to match existing framing, understanding these measurements helps you communicate exactly what you need at the timber yard. The rise over run ratio determines your birdsmouth depth and seat cut angle—critical stuff if you're doing structural work.
Mathematical and Calculator Methods
Not keen on getting up on the roof? Fair enough. There are mathematical approaches and digital tools that'll get you pretty close without risking life and limb.
Formulas That Actually Work
The fundamental formula for converting rise and run to degrees is:
Angle (degrees) = arctan(rise ÷ run)
To go the other way—converting an angle to x:12 pitch—use:
x:12 pitch = tan(angle in degrees) × 12
For example, if someone tells you a roof is 30 degrees, the pitch is: tan(30°) × 12 = 0.577 × 12 = 6.9:12 (call it 7:12).
Want to convert to percentage grade (sometimes used by engineers)? That's:
(rise ÷ run) × 100
So a 6:12 pitch is (6 ÷ 12) × 100 = 50% grade.
Digital Tools Comparison
OmniCalculator's Roof Pitch Tool: Chuck in any two measurements—rise, run, angle, even rafter length—and it spits out everything else. Brilliant for quick checks and it's free. Perfect when you're at the supplier's and need to double-check your maths on the fly.
RoofSnap and Similar Apps: These are more for professional roofers but some offer free trials. You take a photo of the roof from ground level, mark a few reference points, and the app calculates pitch automatically using some clever geometry. Accuracy is generally within a degree or so.
Google Earth Method: Zoom in on your property in satellite view, use the measurement tool to get the building width, then use the 3D view or historical imagery taken at different sun angles to estimate pitch based on shadow length. It's rough but works when you literally can't access the roof.
| Method | Inputs Needed | Output Format | Best For | Limitations |
|---|---|---|---|---|
| Manual calculation | Rise, run | x:12, degrees | Precise site measurements | Requires roof access |
| OmniCalculator online | Any 2 measurements | All formats | Quick verification | Internet needed |
| RoofSnap app | Photos, reference point | Auto-calculated pitch | Remote assessment | $$ for full features |
| Google Earth | Satellite imagery | Approximate degrees | Inaccessible roofs | ±2-3° accuracy |
| Smartphone clinometer | Phone placement | Direct degree reading | Fast checks | Surface must be accessible |
Interpreting and Using Pitch Data
Once you've got your pitch measurement, what does it actually mean for your project? Let's break down the practical implications.
Low-Slope Roofs (4:12 and Under)
These are common on modern Aussie homes, particularly in urban areas where contemporary architecture dominates. A low-slope roof (sometimes called "low-pitch") requires membrane roofing systems or properly installed metal with concealed fasteners. The advantage? They're brilliant for solar panels—that 10-20 degree angle is pretty much optimal for most Australian latitudes, especially in Queensland and Northern NSW where you want panels flatter to catch the high sun.
However, you'll need sarking (a waterproof membrane under the roofing material) as mandatory under the NCC. Water doesn't shed as quickly, so proper flashing and gutter sizing become critical.
Medium-Pitch Roofs (5:12 to 7:12)
This is your typical Aussie suburban roof territory. Steep enough for good drainage, not so steep that you're terrified working on it. Pretty much any roofing material works here—Colorbond, Zincalume, concrete or terracotta tiles. Most major manufacturers like Lysaght and Bluescope design their products around these pitches because they suit our climate perfectly.
From a materials standpoint, a 6:12 pitch means you need that 1.118 multiplier we mentioned earlier. So if your roof measures 100 square metres flat, you'll actually need 111.8 square metres of material to account for the slope.
Steep Roofs (8:12 and Up)
Common on Queenslander-style homes, heritage properties, and anywhere with serious weather considerations. These roofs shed water and debris brilliantly, which is why they're preferred in heavy rainfall areas and bushfire zones. The trade-off? Material costs jump significantly (that 12:12 pitch needs 41% more material than flat), and working on them requires serious safety gear.
Australian Examples by Manufacturer:
- Colorbond: Minimum 5° (1:12) for standard applications, 3° possible with special modifications
- Lysaght Klip-Lok: 2° minimum, though 5° recommended
- Terracotta tiles: 15° absolute minimum per AS 2050, 17.5° preferred
- Concrete tiles: Similar to terracotta, 15-20° depending on profile
The material multiplier formula if you're keen: 1 ÷ cos(arctan(x ÷ 12)). So for an 8:12 pitch: 1 ÷ cos(arctan(0.667)) = 1 ÷ cos(33.69°) = 1 ÷ 0.832 = 1.202 multiplier.
Troubleshooting and Common Errors
Even experienced tradies run into issues when measuring roof pitch. Here's how to sort out the most common problems.
Uneven Settling
Older Australian homes, particularly those built before the 1980s, often have settling issues. One side of the roof might measure 6:12 while the other's closer to 5.5:12. The solution? Measure at least three points along each major roof section—front, back, and both sides if you've got a hip roof. Average these measurements, but note the variations in your records. If the difference is more than a full pitch unit (like 6:12 versus 5:12), you might have structural issues worth investigating with a building inspector.
Obstructions and Limited Access
Skylights, solar panels, satellite dishes—modern roofs are cluttered. If you can't get a clear run with your level, use a smartphone app held against an accessible section of rafter or fascia board. Alternatively, get yourself a longer spirit level or a laser level that can shoot across obstructions. Some tradies use a plumb bob and string to create reference lines when working around obstacles.
Non-Level Starting Points
If your eaves or gutters aren't level (and mate, they often aren't on older homes), your measurements will be off. Before starting, verify your level itself is accurate—test it on a surface you know is true, flip it 180 degrees, and check if it reads the same. For roof measurements, always establish your horizontal reference with the level first, then measure relative to that, not the gutter line.
Error Checking Checklist:
- Level calibrated and bubble dead centre
- Measurements taken at 3+ locations
- Run measured horizontally, not along slope
- Rise measured perfectly vertical
- Calculator set to degrees (not radians or grads)
- Variations between measurements less than 10mm
- Reference photos taken
- Safety gear checked before roof access
When to Call a Professional:
If you're planning structural modifications, retrofitting an older roof to meet current NCC standards, or dealing with a complex roof design (multiple pitches, unusual valleys), get a structural engineer involved. It'll cost you a few hundred for a report, but it's worth it for peace of mind and avoiding costly mistakes. Insurance companies and councils will often require engineer certification anyway for major work.
Australian Standards and Local Tips
Understanding the regulatory landscape saves headaches down the track.
The NCC Volume 2 (which covers houses and small buildings) sets out waterproofing requirements based on pitch. Below 10 degrees, you need a membrane system. Between 10 and 20 degrees, overlapping materials like tiles need proper sarking underneath. Above 20 degrees, standard installation techniques apply, though bushfire zones add extra requirements.
AS 2050 specifically addresses roof tiling and gets into the nitty-gritty of fastening requirements, overlap distances, and minimum pitches for different tile profiles. If you're replacing tiles, your roofer should be referencing this standard—if they're not, that's a red flag.
BAL Zones and Pitch
In Bushfire Attack Level zones—which cover huge chunks of regional Australia—roof pitch affects your construction requirements. BAL-12.5 and above generally require pitches of 22 degrees or steeper for better ember shedding. Flatter roofs need additional protective measures like metal capping and ember guards.
State Variations
Queensland: Cyclone-prone areas (roughly anywhere north of Bundaberg) have additional requirements under the Queensland Building Code. Minimum pitches might be higher, and fastening requirements are much stricter.
Victoria and Tasmania: Snow loading becomes a factor in alpine areas. Steeper pitches (8:12 minimum) help snow slide off, preventing dangerous buildup.
Western Australia: The exposed coastal strip has specific requirements for corrosion resistance and wind uplift, which interact with pitch considerations.
Supplier Resources: Bluescope's "Residential Roof Selection Guide" and CSR's "Pitch Perfect" app both provide state-specific recommendations. Download them before meeting with suppliers—they're genuinely useful, not just marketing fluff.
What is a 30-degree roof pitch expressed as x:12?
A 30-degree pitch converts to approximately 7:12. The exact calculation is tan(30°) × 12 = 6.93:12, which rounds to 7:12 for practical purposes. This is a fairly steep pitch by Australian standards—you'd see it on heritage homes or high-style contemporary designs.
Can I accurately measure roof pitch from the ground?
Yeah, with the right approach. The shadow method works on sunny days: measure your roof's length and the shadow length at the same time, then use trigonometry. More practically, apps like Pitch Gauge let you photograph the roof and calculate pitch using reference points. Accuracy is generally within 1-2 degrees, which is fine for planning but not precise enough for compliance documentation.
What's the absolute minimum pitch for metal roofing in Australia?
Under the NCC, it's 5 degrees (approximately 1:12) for standard exposed-fastener metal roofing. However, concealed-fix systems like Klip-Lok can go as low as 2-3 degrees with proper installation. Always check the specific manufacturer's guidelines—Colorbond, for instance, has detailed pitch requirements in their technical manual that sometimes exceed NCC minimums.
How does roof pitch affect gutter sizing?
Steeper roofs shed water faster, meaning higher flow rates into your gutters. A 10:12 pitch might need gutters 25-30% larger than a 4:12 pitch on the same house. This is where a lot of DIY reno jobs go wrong—they replace the roof without upgrading gutters, then wonder why they overflow in heavy rain. Check AS/NZS 3500.3 for proper gutter sizing calculations based on pitch and roof area.
What's the ideal roof pitch for solar panel efficiency in Australia?
For Android and iPhone, Roof Pitch Calculator (free, simple interface) and TheoCalc (more features, includes material calculators) are both solid. If you're a professional, RoofSnap or EagleView offer advanced features with automatic measurements from aerial photos. For quick checks, even the free clinometer apps work surprisingly well—just hold your phone against a rafter or the roof surface.
What's the ideal roof pitch for solar panel efficiency in Australia?
Generally between 5:12 and 3:12 (about 10-25 degrees), depending on your latitude. In Sydney, 20-25 degrees is optimal. Further north in Brisbane or Darwin, flatter is better—around 10-15 degrees. The rule of thumb is pitch roughly equal to your latitude, but that's often impractical. The good news? Solar output only drops 5-8% even if you're 10 degrees off optimal.
How do I convert roof pitch to a percentage grade?
Simple formula: (rise ÷ run) × 100. So a 6:12 pitch is (6 ÷ 12) × 100 = 50%. Engineers and civil works often use percentages rather than ratios. To go backwards from percentage to pitch: (percentage ÷ 100) × 12 = x:12. A 25% grade equals 3:12 pitch.
Are hip and valley pitches different from the main roof pitch?
Are hip and valley pitches different from the main roof pitch?
They can be, yeah. Valleys are typically at the same pitch as the roof planes that form them, but hips are actually steeper than the adjacent roof sections due to geometry. The hip pitch multiplier is 1.414 times the main roof pitch. So if your main roof is 6:12, the hips run at effectively 8.5:12. This matters when cutting jack rafters or ordering hip ridge capping.
Is a 4:12 pitch considered low slope?
In Australian building terms, yes. Anything below 5:12 is generally treated as low-slope, requiring additional waterproofing measures. The NCC specifically calls out the 10-degree mark (about 2:12) as the point where you need continuous membrane waterproofing. A 4:12 pitch is borderline—you don't need full membrane, but sarking is mandatory.
What tools do professionals use versus DIY?
Professional roofers typically carry digital angle finders, laser levels, and often use drone photography for quotes. DIYers can get away with a good spirit level, tape measure, and free smartphone app. The difference is more about speed and convenience than accuracy—a properly used $20 level gets the same result as a $300 laser, it just takes longer and requires roof access.
Does roof pitch impact insurance claims after storm damage?
Absolutely. Insurance assessors check whether the installed materials are appropriate for the pitch. If you've got tiles on a 12-degree roof (below the 15-degree minimum), your claim might be denied for non-compliant installation. They'll also verify that damage patterns match the claimed events—the pitch affects how debris impacts and where water penetrates.
How do I measure pitch on heritage roofs without damaging them?
For heritage properties, never walk directly on old tiles—they're brittle and irreplaceable. Use an extension pole with a digital angle finder attached, or work from inside the roof space measuring rafters. Many heritage buildings have accessible loft spaces perfect for measurements. If you can't access safely, hire a heritage building consultant who has proper equipment and insurance—it's worth the $200-300 to avoid destroying a 100-year-old roof.